After my last post I got some feedback about the use of mandatory profiles and how to implement them using RES Workspace Manager. First of all you have to create a mandatory profile for the OS you want to use. Let’s say you want to create a mandatory profile for Windows 7. Microsoft published a great how-to on their website containing the following steps:
You can configure the default local user profile to become a mandatory profile. By doing this, you can have one central profile that is used by all users. To do this, you have to prepare the mandatory profile location, copy the local default user profile to the mandatory profile location, and then configure a user’s profile location to point to the mandatory profile.
Step 1: Prepare the mandatory profile location
- On a central file server, create a new folder or use an existing folder that you use for roaming user profiles.
- If you are creating a new folder, share the folder by using a name that is suitable for your organization.
Note The share permissions for shared folders that contain roaming user profiles must enable Full Control permissions for the Authenticated Users group. The share permissions for folders that are dedicated to storing mandatory user profiles should enable Read permissions for the Authenticated Users group and enable Full Control permissions for the Administrators group.
- Create a new folder in the folder that is created or identified in step 1a. For example, the following domain has a mandatory profile, and the folder name begins with the word “mandatory”:
- Finish naming the folder by adding .v2 after the name.
Step 2: Copy the default user profile to the mandatory profile location
- Log on to the computer that has the customized local default user profile by using an account that has administrative credentials.
- Click Start from the Start menu, right-click Computer, click Properties, and then click Advanced System Settings.
- Under User Profiles, click Settings. The User Profiles dialog box shows a list of profiles that are stored on the computer.
- Select Default Profile, and then click Copy To.
- In the Copy profile to text box, type the network path of the Windows default user folder that you created.
- Under Permitted to use, click Change, type the name Everyone, and then click OK.
- Click OK to start to copy the profile.
- Log off the computer when the copying process is completed.
- On the central file server, locate the folder that you created in the “step 1: Prepare the mandatory profile location” section.”
- Click Organize, and then click Folder options.
- Click the View tab, click to select the Show hidden files and folders check box, click to clear the Hide extensions for known file types check box, click to clear the Hide protected operating system files check box, click Yes to dismiss the warning, and then click OK to apply the changes and close the dialog box.
- Locate and right-click the NTUSER.DAT file, click Rename, change the name of the file to NTUSER.MAN, and then press ENTER.
After this you can place this mandatory profile in RES Workspace Manager so there’s a copy of this mandatory profile in the cache of the local machine, these are the steps to add the mandatory profile in the database:
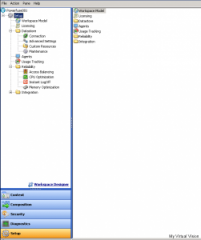
1. Open “Res Workspace Manager”
2. Go to “Setup”
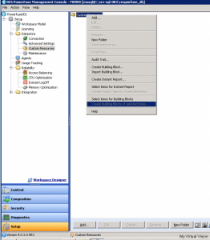
3. Click on “Datastore” and select “Custom Resources”
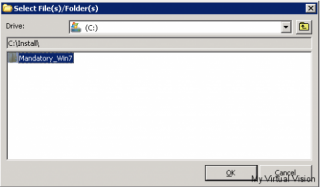
Click on “Add” and select the folder for the mandatory profile.
Now the mandatory profile will be stored in the folder C:\Program Files\RES Workspace Manager\Data\DBCache\Resources\custom_resources\[FolderName]
Step4: Prepare a user account
- As a domain administrator, open the Active Directory Users and Computers management console from a Windows Server 2008 R2 or Windows Server 2008 computer.
- Right-click the user account to which you want to apply the mandatory user profile, and then click Properties.
- Click the Profile tab, type the following path: C:\Program Files\RES Workspace Manager\Data\DBCache\Resources\custom_resources\Mandatory_Win7
- Click OK, and then close the Active Directory Users and Computers management console.
The user will now use the customized mandatory user profile from the local cache of RES Workspace Manager, when you include the powerful feature of the dynamic desktop this is a great way to have the stability and slimness of mandatory profiles and the flexibility of roaming profiles.
Kees Baggerman
Latest posts by Kees Baggerman (see all)
- Nutanix AHV and Citrix MCS: Adding a persistent disk via Powershell – v2 - November 19, 2019
- Recovering a Protection Domain snapshot to a VM - September 13, 2019
- Checking power settings on VMs using powershell - September 11, 2019
- Updated: VM Reporting Script for Nutanix with Powershell - July 3, 2019
- Updated (again!): VM Reporting Script for Nutanix AHV/vSphere with Powershell - June 17, 2019


